
In this tutorial, we'll go over onboarding a monthly rate client with Credit Repair Cloud and Smart Credit. This tutorial assumes we're on a phone call with a lead. Below is a detailed video which covers each step. We'll break down the steps in greater detail below.
In order to access the client's credit report, we'll select view/edit profile, copy their email address into smart credit, then we'll grab the password from the "Memo" field in CRC.
Once logged in, we'll be prompted with a credit card field, we'll ignore that and select Have a Sponsor Code? in the top right of the form. We'll grab the sponsor code from the memo field of the client's memo field.
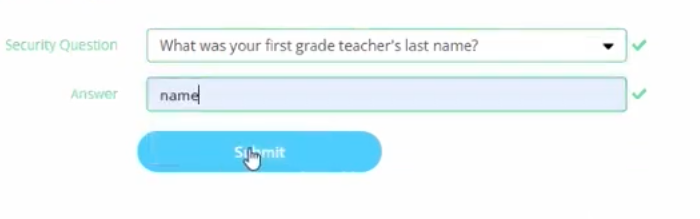
When we submit and continue, we'll have to refresh the page and agree to the terms and conditions (checkbox) then select Submit & Continue. Once logged in, we'll select a security question from the list. Choose the second question, "What was your first grad teacher's last name?" and type in "name" for the answer.
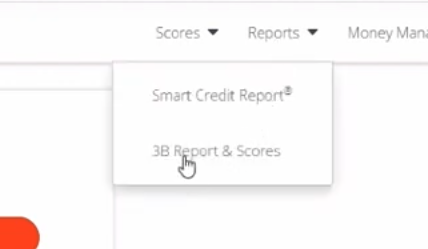
Once logged in, we'll find the Reports tab in the top right, and in the dropdown select 3B Report & Scores.
Select Switch to Classic View.

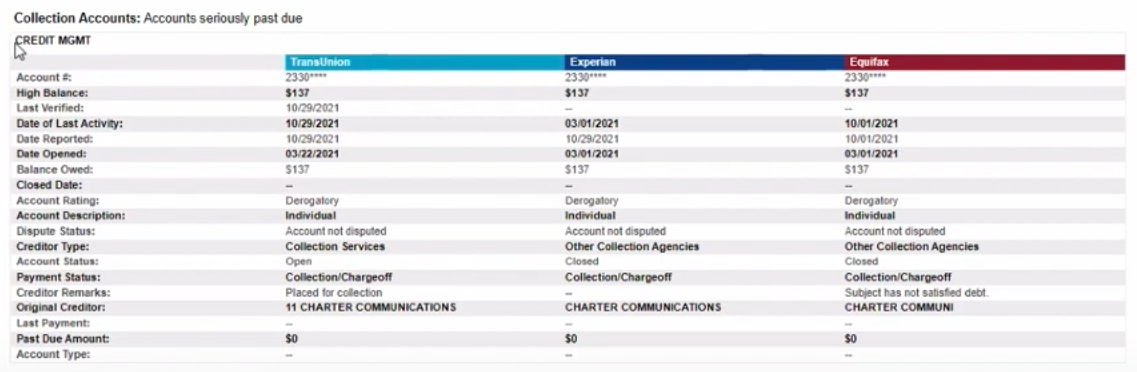
Review the report with the client, making note of any and all negative items that need to be disputed.
IMPORTANT: At this step we'll take the opportunity to talk about the pricing options, Pay Per Delete, and the Monthly Rate.
Once the client has agreed to the Monthly Rate billing option, we'll need to create portal access.
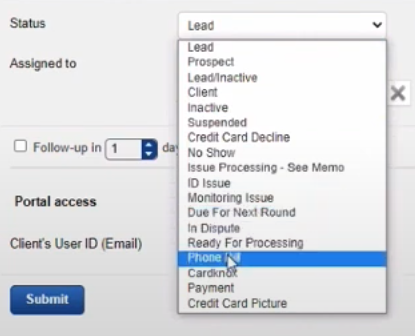
The first step in the process is generating a proof of address for the client in the form of a phone bill. In order to do that we'll change the status from Lead to Phone Bill.
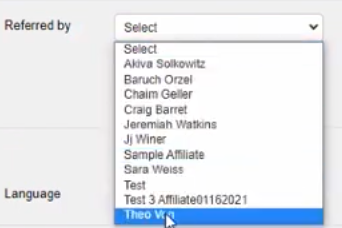
Next, we'll specify a referral if there was any.
We'll change the portal access field to On in order to trigger an email prompting the client to sign up for our services. We'll also need to specify the type of agreement, by typing in "MON" for Monthly Rate. Select Monthly Rate and press Submit.
In order to successfully guide the customer through the next step it's important to get an understanding of this process from the customer's view point.
This step will start with an email. As long as their email was input correctly in CRC, they will get an email that looks like this.
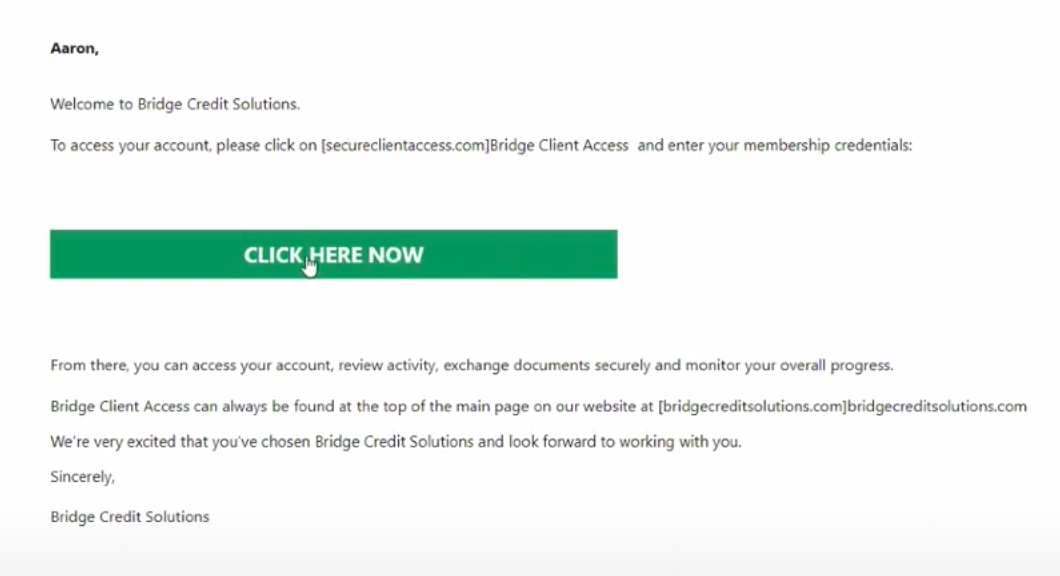
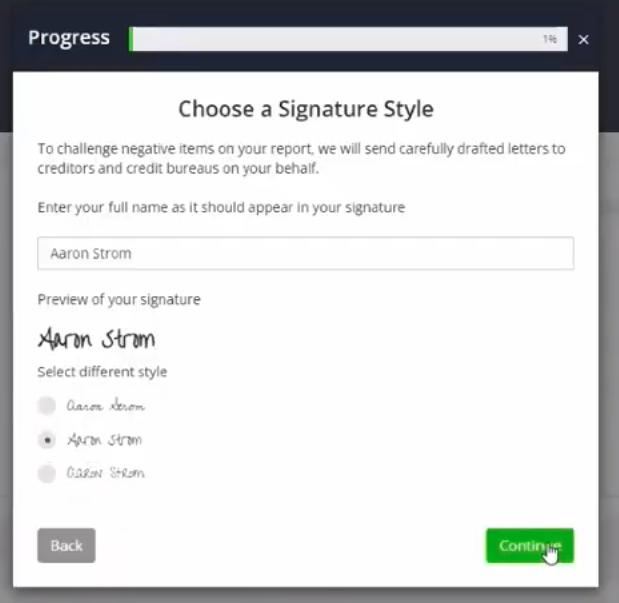
The client will then be taken to secureclientaccess.com, where they'll be instructed to choose a password. When the client logs in they'll be prompted with the agreement.
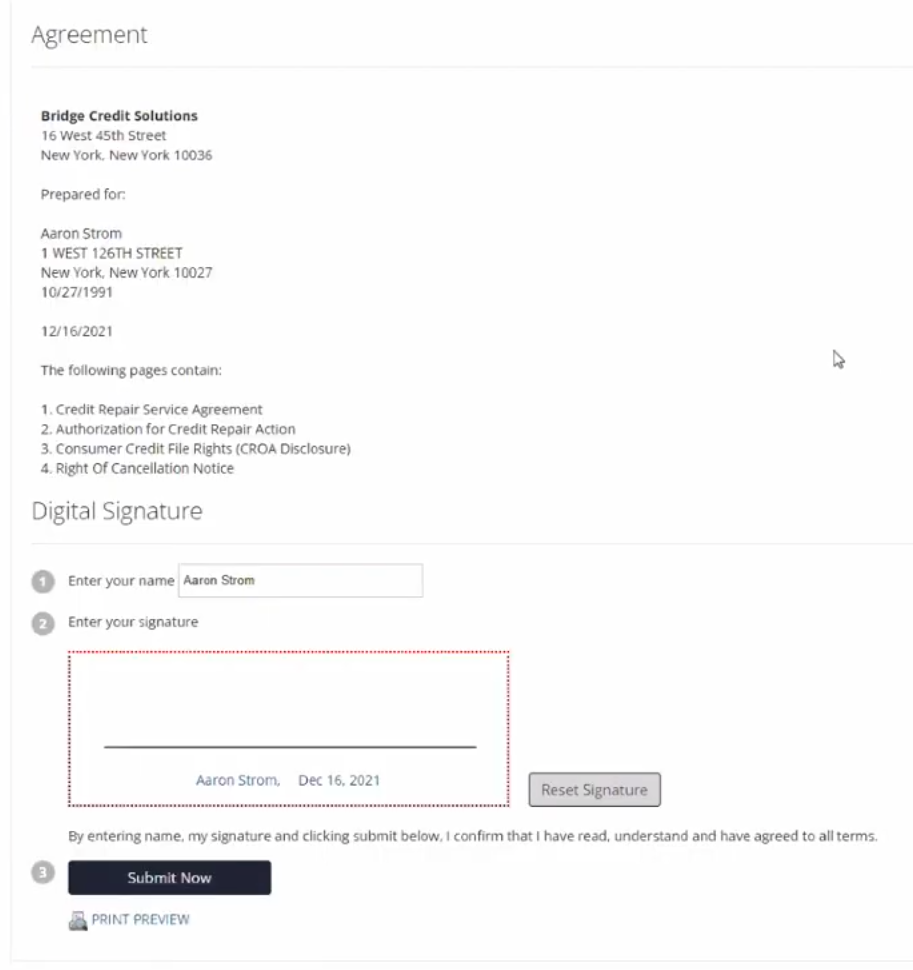
When client logs in they'll be prompted with the agreement. Will have them scroll down to the middle of the page. We will go all over the charges.
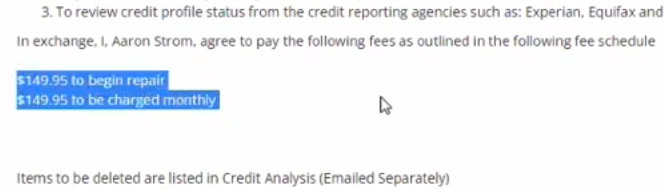
We'll explain to the client that they'll be charged $149.95 monthly, starting today. We'll also explain to the client that Bridge Credit Solutions covers the first 30 days of smart credit, at which point the billing will be switched over to the client and payments will be their responsibility. The charges will be $21.99 per month at that point.

We will instruct the client to place their signature in the box down below and click Submit Now.
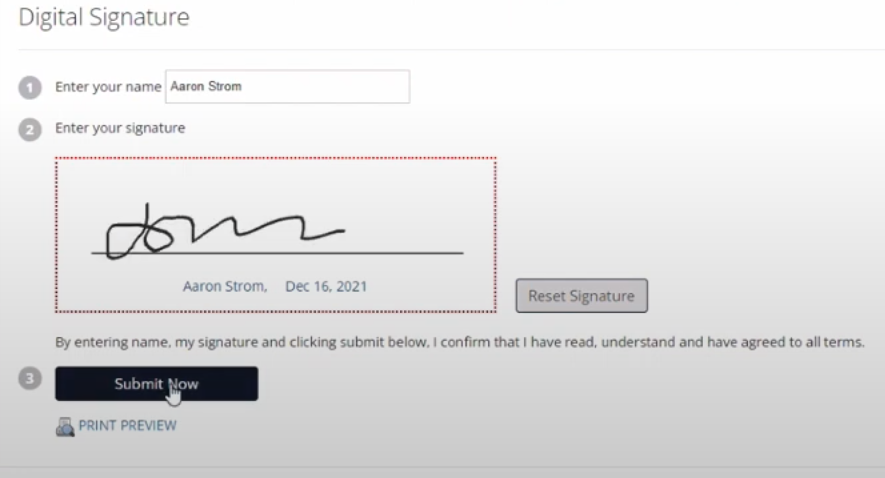
When the client reaches the next page we will instruct them to close out of the pop-up and begin setting up their digital signature.
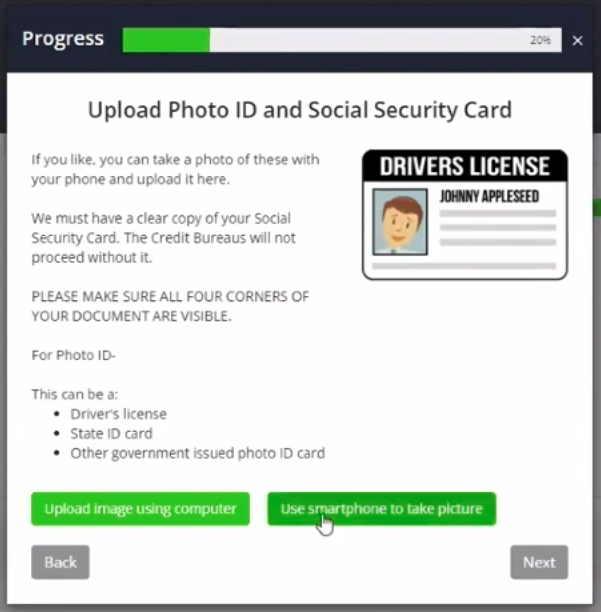
Once this is complete, the next step is uploading a photo ID. We'll have them select, Use a smartphone to take picture. Once the phone number is typed in, the client will receive a link to upload a photo from their smartphone. We want to instruct the client to ensure that the photo is visible, that we can see all four sides of the ID, that there are no thumbs or fingers in the way and the photo is not taken from too far away.
When the client tells us that they have uploaded the photo, we'll go back to CRC to refresh the page and download the photo ID copy by clicking the down arrow button shown below.

We'll want to check the photo on our desktop, if the photo looks good we can instruct the client to leave the portal.
We're going to send an email to the client instructing them to send payment details. We'll do this by initiating another status change. So we'll click on status and we'll go to Credit Card Picture. At this point, the client will get an email prompting them to send a picture of their credit card front and back.

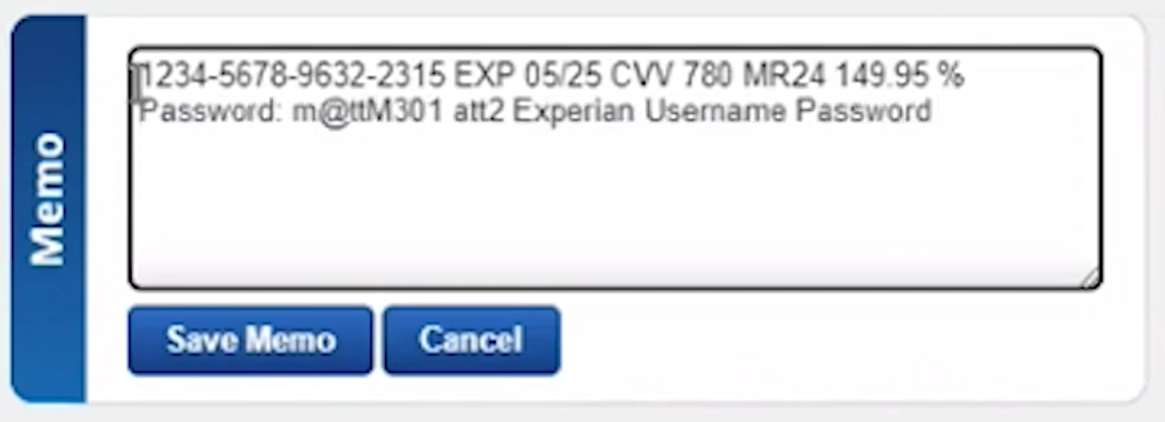
Once we get those photos, we will then add the credit card information into the memo field using the specific format to trigger payment.
1234-1234-1234-1234 EXP 05/25 CVV 123 MR24 149.95 %
It's important that we follow this exact format for processing credit cards, otherwise the transaction will not work. We'll click save memo from there.
We'll change the status from credit card picture back to Payment so that we can process this payment. We'll have to confirm payment went through by waiting for a confirmation email upon a successful transaction. We'll want to ensure the transaction status says, "Approved".

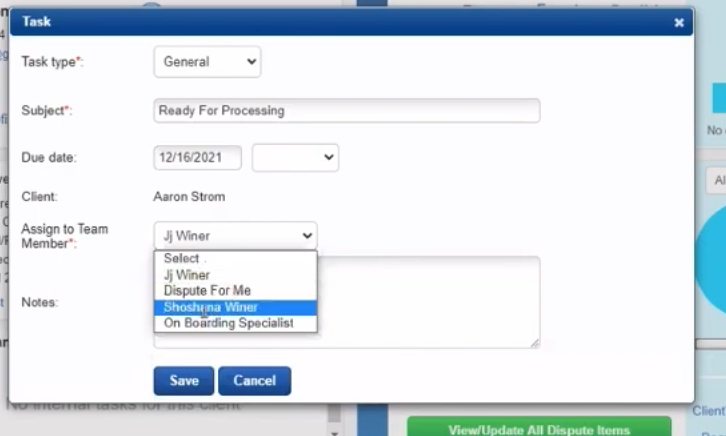
At this point we can go back to credit repair cloud. We can tell the client that we are done in the transaction has been completed. We can tell them how to reach us in the future and the last step of the process is going to "Add Task" and we'll type in Ready For Processing. We'll set the due date for the current date, and in the Assigned to Team Member dropdown, will select Shoshanna Weiner.
Once that's saved, you are all set with the onboarding part of the training tutorial.